Physical Address
304 North Cardinal St.
Dorchester Center, MA 02124
Physical Address
304 North Cardinal St.
Dorchester Center, MA 02124
Servo motors are essential components in various applications, from robotics to industrial automation.
Unlike traditional motors, servo motors can be precisely controlled to rotate to a specific angle, making them ideal for tasks requiring accuracy and precision.
One common method of controlling servo motors is by using an Arduino microcontroller in conjunction with a potentiometer. This setup allows for real-time control of the servo motor’s position, making it a popular choice for hobbyists and professionals alike.
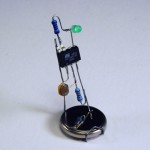
A potentiometer, often referred to as a pot, is a three-terminal resistor with a sliding or rotating contact that forms an adjustable voltage divider. By varying the position of the sliding contact, users can adjust the resistance, which in turn alters the voltage output.
In the context of servo motor control, a potentiometer serves as an input device, allowing the user to dictate the desired position or angle of the servo motor. As the potentiometer’s shaft is rotated, it generates an analog voltage signal proportional to its position.
Arduino boards are popular among electronics enthusiasts due to their versatility and ease of use. By connecting a servo motor and a potentiometer to an Arduino board, users can create a simple yet effective system for controlling motor position.
The Arduino reads the analog voltage output from the potentiometer and converts it into a corresponding angle for the servo motor. This angle determines the motor’s position, allowing for precise control over its movements.
To implement servo motor control with a potentiometer using an Arduino, follow these steps:
Connect the potentiometer’s three terminals to the Arduino’s analog input pin, 5V, and ground, respectively.
Connect the servo motor’s signal wire to one of the Arduino’s digital output pins (e.g., pin 9).
Power the servo motor by connecting its VCC pin to the Arduino’s 5V pin and its ground pin to the Arduino’s ground.
Below is a sample Arduino code for controlling a servo motor with a potentiometer:
#include

Servo myservo;

int potPin = A0;

int potValue = 0;

void setup() {

myservo.attach(9);

}

void loop() {

potValue = analogRead(potPin);

int angle = map(potValue, 0, 1023, 0, 180);

myservo.write(angle);

delay(15);

}
By interfacing a potentiometer with an Arduino, enthusiasts can create sophisticated servo motor control systems for various applications. Whether in robotics, automation, or DIY projects, this setup offers flexibility, precision, and ease of implementation.
Experimenting with different potentiometer and servo motor combinations opens up a world of possibilities for innovation and creativity in electronics and mechatronics.